
Our Tile Installation Process
Every Dmtilellc project follows the same sequence, and the sequence is the reason the result holds up. Here is what happens at each step, what can go wrong if it is skipped, and how long it takes.
The Short Answer
The Sequence, From the First Call to the Last Silicone Joint
Tile is the last hour of the job. Everything before it decides whether the job is still good in five years. This is the order, every time.
- The estimate visit. Free and written. We measure, we look at the framing, we write down the system we are going to use.
- Demo. We open up what has to come out, and we find out what is behind it.
- Substrate prep. The floor gets rebuilt, leveled and fastened so it can carry what goes on it.
- Waterproofing. In a wet room, a bonded membrane, the corners turned, the drain lapped, and then the flood test.
- Layout. The slope of the floor and the position of every cut get decided before any tile is set.
- Setting the tile. Full bed thinset, calibrated spacers, and leveling clips on large format.
- Grout, silicone and the movement joints. The joints that move get silicone, the joints that do not get grout.
- Cure and walkthrough. We wait the time the product needs, and we walk it with you.
Step One
The Estimate Visit: What Gets Measured Before Anything Is Sold
The estimate is free and it is written, because a number you can read is worth more than a number you were told. It comes line by line, so you can see what the money buys.
- We look at the framing. Not the tile, the structure under it. How far the joists span, whether they are properly supported, and whether the floor is going to be stiff enough for what is going on top of it.
- We measure the flatness. A 10 foot straight edge across the high points of the floor, not a glance at it.
- We check the substrate. Solid, dry and fastened, or it is not ready for tile.
- We write down what we find. If the floor needs work, the estimate says so and says what it costs. If it is in good shape, you hear that too.
The 28-day plan and what to do next are laid out on our guide to how long a bathroom remodel takes, and the cost drivers are on the bathroom remodel cost drivers page.
Step Two
Demo, and What Demo Uncovers
Demo is where the estimate gets tested. Everything you can see from the outside is removed, and then we find out what the outside was hiding.
What Sits Behind the Old Tile
In an older tub surround, what is behind the tile is often adhesive and a hardboard panel sitting against framing that has been wet at some point. Under a bathroom floor, a soft spot means the plywood got wet and it has to come out. Neither of those is visible until the old surface is off.
Found Conditions Are Priced Before Work Continues
What we do about it is the same thing every time: we stop, we write down what we found, and we price it before we carry on. Not after. A change you find out about when the final invoice arrives is a change you cannot argue with.
- Demo and demolition are separate line items. So is taking away the old floor and bringing out the debris. It is real work and it is priced as work.
- A found condition is a written change, not a surprise. The scope, the cost and the effect on the schedule all go in writing before the work continues.
Step Three
Substrate Prep: The Step That Decides Everything
This is the step people want to skip, because it is invisible when it is done well and it is the only thing standing between the tile and a crack in three years.
How Flat the Subfloor Must Be
A subfloor has to be solid, flat, dry and fastened. ANSI A108.02 sets the flatness tolerance: a quarter inch in 10 feet with no more than a sixteenth of an inch in 12 inches for standard tile. For tile with an edge of 15 inches or more, and for natural stone, it tightens to an eighth of an inch in 10 feet and a sixteenth of an inch in 2 feet. It is measured with a 10 foot straight edge laid across the high points.
A Panel Not Fastened Is Not a Subfloor
Fastening is in the same standard. ANSI A108.02 puts the fasteners at 6 inches on center along the panel edges and 8 inches on center each way through the field. A panel that is not fastened to the framing is not a subfloor, whatever it is made of.
- Plywood builds the floor. It is the structural layer and nothing replaces it.
- Cement board makes it work in a wet room. It adds stiffness and it does not rot. It is not structural on its own, so it sits on top of a proper subfloor, not instead of one.
- An uncoupling membrane isolates the tile from the floor. A sheet with a waffle pattern on it, such as DITRA, and the mortar bed sits on the waffle. It is the answer that lets an old floor stay where it is.
- Particle board comes out. It has no place under tile in a wet room, and where it has been wet it is gone.
- Thinset is not a leveling compound. It is an adhesive. Where the floor misses the tolerance it gets leveled properly with a patch or a self leveler, not skimmed with mortar.
Our guide to preparing a subfloor for tile goes into all of this in detail, including the failures you can check for yourself before anyone quotes.
Step Four
Waterproofing and the Flood Test
In a wet room, the waterproofing is the system and the tile is the finish. If the system is right, the wall stays dry for the life of the house. If it is wrong, no amount of good tile on top of it changes that.
We Use a Bonded Membrane
We use a bonded membrane, and Schluter-KERDI is the named system in our copy. The sheet goes onto the substrate with its own adhesive, the corners are turned and sealed rather than coated, and the drain is lapped into the sheet so the water has one way to go and it is not through the wall. The pan is either prefabricated foam or built with the slope already in it.
The Flood Test Finds the Leak
Then we test it. The shower receptor is filled with potable water to a depth of not less than 2 inches measured at the threshold, and the water is held not less than 15 minutes with no evidence of leakage. That is what the 2022 Connecticut State Building Code asks for. We hold it 24 hours, because the extra time costs us a day and the leak it catches costs a wall.
- Corners get turned, not coated. A corner is the place a membrane fails first, and it is the place the detail has to be right.
- The slope is decided before the membrane goes down. It cannot be corrected after, because the membrane follows the pan.
- The drain is the detail. The sheet has to lap into the drain flange properly, and that is where a shower gets opened up years later if it was not.
The layers, in order, are in our guide to what goes behind shower tile , including the difference between a pan and a membrane and why the order is not negotiable.
Step Five
Layout: The One Chance Decisions
Once the tile is set, the layout is set. Every cut position, every joint, and the way the floor reads from the door are decided here, before the first tile is stuck.
- The slope of a wet room floor is set first. Before the membrane, because the membrane follows the pan and the tile follows the membrane. A shower floor is not a flat floor.
- Laser levels set the reference lines. The courses are laid out against a true line so the tile is level in every direction and not just in one.
- Cuts get placed where they read well. On a floor, a cut line that runs from a doorway into a corner is fine. One that crosses the middle of the field is not.
- A feature or a band gets planned, not discovered. If there is a border or a picture area, the field gets sized to it.
Step Six
Setting the Tile
This is the part the homeowner sees, and it is the part that shows whether the work underneath was right. It is also the part that cannot be corrected later.
- Full bed thinset. The mortar is combed so it is the same depth across the whole piece, not a skim that leaves voids under the tile. A void is a hollow place that the tile finds later.
- Calibrated spacers hold the joint. The joint width is set by the tile and by the standard, and it is the same on every side of every piece.
- Leveling clips on large format. A 15 inch edge or more sits on the high points and rocks on the low ones, and that is what shows up as lippage. The clips bring the piece into one plane while the mortar is still workable.
- Edges get a profile, not a guess. Bullnose or a Schluter profile at an outside corner and a transition, so the edge is protected and the joint is a real joint.
Floor and Wall Tolerances Differ on Purpose
The floor tile and the wall tile are set to different tolerances for a reason, and the difference is the flatness of the floor underneath. Our L/360 and L/720 guide explains what the framing has to do before any of this starts.
Step Seven
Grout, Silicone and the Movement Joints
The last step is the one people do not think about, and it is the one that decides whether the surface still looks right in a few years.
Which Joints Get Grout and Which Get Silicone
Grout goes in the joints that do not move. Silicone goes in the joints that do: the change of plane between a wall and a floor, the corners of a shower, the line where tile meets a different material, and the perimeter of the floor where it meets the wall. Grout in a movement joint cracks, because the joint is designed to open and grout is not designed to.
- The type of grout follows the material. Cement grout is porous and takes a sealer, and epoxy grout does not absorb. Natural stone has its own rules. Our grout color guide covers which is which and what the color does.
- The joint is cleaned before it is filled. Grout haze is removed off the face of the tile while it is still workable, not scrubbed off the next day.
- Silicone is a movement joint, and it is a detail. It is tooled rather than smeared, and the surfaces it bonds to are clean.
Step Eight
Cure Time and the Walkthrough
The job is not finished when the last joint is filled. Setting materials need time before they are walked on, and the time they need is in the product instructions, not in a rule of thumb.
What We Check at the Walkthrough
Then we walk it. We check the flatness we promised, we check the corners and the edges, and in a wet room we show you the flood test result. We clean the site before we leave it, and the 1-year written workmanship warranty starts when the job is done and you have signed it off.
- We tell you the wait before we leave. When it can be walked on, when it can be wet, and when the silicone has cured. It is on the estimate so there is no guessing.
- The walkthrough is a checklist, not a walk around. The flatness gets measured, the joints get checked, the hardware gets checked, and the flood test result gets shown to you.
The Honest Numbers
How Long It Actually Takes
Two numbers, both of them on the rest of this site, and both of them about wet rooms because that is where the sequence above is longest.
- A shower retile on the existing tub is 2 to 3 working days on site. Same tub, same drain position, the surround comes off and the new tile goes on.
- A full shower rebuild is 4 to 6 working days. The old surround comes out, the pan is rebuilt, the waterproofing is new, and then it is tiled.
The Schedule Goes on the Estimate
A floor or a backsplash is a different number again, and it moves with the size of the area, the state of the substrate and whether anything has to happen to the floor first. We write the schedule on the estimate, and that is the schedule we work to.
The Honest Part
What Goes Wrong When a Step Is Skipped
These are not stories about other people's jobs. They are the mechanisms, and each one has a step in the sequence above that stops it.
- Membrane over a slope that was never set. The sheet follows the pan, so a pan that was built flat traps water in a low corner that never drains. The water sits there until it finds a way out, and it finds it through the wall. The slope is set before the membrane for exactly this reason.
- Coating a corner instead of turning it. A corner is the hardest place on the wall for a membrane to stay bonded to, because it moves. A coated corner eventually separates, and a separated corner is a leak behind the tile where nobody can see it.
- Tile over particle board. It is the wrong material under tile in a wet room. It swells, it loses its strength, and the floor goes soft under a finish that does not care. It comes out.
- Thinset used to fill a dip. It is an adhesive, and it is not strong enough to bridge a hollow place, so the tile ends up spanning it and breaking. A low spot gets a patch or a self leveler.
- Grout in a movement joint. The joint is there because something moves. Grout is rigid, so it cracks, and the crack then takes water.
Why These Failures Stay Hidden
None of these is a dramatic failure. They are quiet ones, which is why they get found years later when somebody opens the wall.
Who Is In Your House
Who Does the Work
Daniel sets all of it, and he does it with his own crew. Nothing is handed to a subcontractor, so the people who set the tile are the people you deal with, from the first measurement through the final grout.
There are 10+ years of tile installation behind that, and 20 five-star Google reviews. Every job carries a 1-year written workmanship warranty.
- We set tile, all stone and all marble. We do not sell any of it. You buy the material and we set what you bought.
- Plumbing and electrical are other trades. They pull their own permits and we tell you which items need them before the job starts.
- Registered, not licensed. Dmtilellc is a registered Connecticut home improvement contractor, CT HIC #0706534. Connecticut issues no tile licence, so the registration is the credential and we say what it is.
Connecticut Notes
Permits and Code, For This Job
Tile work is finish work. Under the 2022 Connecticut State Building Code, tiling and similar finish work that does not change anything structural is exempt from a building permit.
When Tile Work Stops Being Finish Work
The moment a job adds plumbing or electrical it is no longer only finish work. A new valve, a moved drain, a new supply, new wiring for a heater or a light: those are permitted separately by the licensed trade that performs them, and they pull those permits. We flag them at the estimate so the job does not stop halfway.
- A shower flood test is code. The receptor is filled with potable water to a depth of not less than 2 inches at the threshold and held not less than 15 minutes with no evidence of leakage. We hold it 24.
- A homeowner doing their own work is a separate thing, and it is a question for the town. We do not work around it.
Our guide to permits for a bathroom remodel in Connecticut goes through which items sit where and who pulls them.
Frequently Asked Questions
Tile Installation Process - Questions
It depends on the scope, and the two numbers we publish are for the most common jobs. A shower retile on the existing tub is 2 to 3 working days on site. A full shower rebuild, where the old surround comes out and the pan is rebuilt, is 4 to 6 working days. A floor or a backsplash is its own number again, and it moves with the size of the area, the condition of the substrate and whether anything else has to happen first. We write the schedule on the estimate, and it is the schedule we work to.
Everything that can be checked is checked, because nothing under the tile can be fixed after the tile is on it. We open up what needs opening, measure the flatness, look at the framing, check the substrate for solidity and for moisture, and write down what we find. Then the scope goes on the estimate as line items, including anything we found that the homeowner did not know was there. The tile is set last, on a surface we have already confirmed will hold it.
Every wet room, every time, and it is the step that catches the problem while it is still cheap. The shower receptor is filled with potable water to a depth of not less than 2 inches measured at the threshold, and the water is held not less than 15 minutes with no evidence of leakage, which is what the code asks for. We hold it 24 hours, because the extra time costs us a day and the leak it catches costs a wall. If a drop moves, we find it before the tile goes on.
Sometimes, and the usual answer is a decoupled membrane. A sheet with a waffle pattern on it goes down over the old floor, and the mortar bed sits on the waffle instead of bonding to the old tile. It isolates the new tile from the movement of the floor, and it means the old floor can stay where it is. Tiling straight over the old tile also means the old floor and the new one move differently, and that is what cracks the new floor. It is worth looking at the old floor before we decide.
The plumber does, and that is correct. Moving a valve, running new supply, or adding a drain is trade work, and it is permitted separately by the licensed plumber or electrician who performs it. Under the 2022 Connecticut State Building Code, the tile work itself is exempt from a building permit as long as nothing structural changes and no new plumbing or wiring is involved. We flag the items that need another trade before the job starts, so the job does not stop halfway. Our guide to permits covers which items sit where.
The grout has to be clean and the joints have to be full, the silicone has to be in and smooth, and the hardware has to be on and tight. Then we walk it with you. We check the flatness we promised, we check the corners and the edges, we show you the flood test result for a wet room, and we clean the site before we leave. The 1-year written workmanship warranty starts when the job is done and you have signed it off.
Still have questions? Call us at (860) 990-2332
Where this work gets done
Floor tile installation, Tile installation in New Britain by Dmtilellc across Connecticut. Ask for a free estimate.
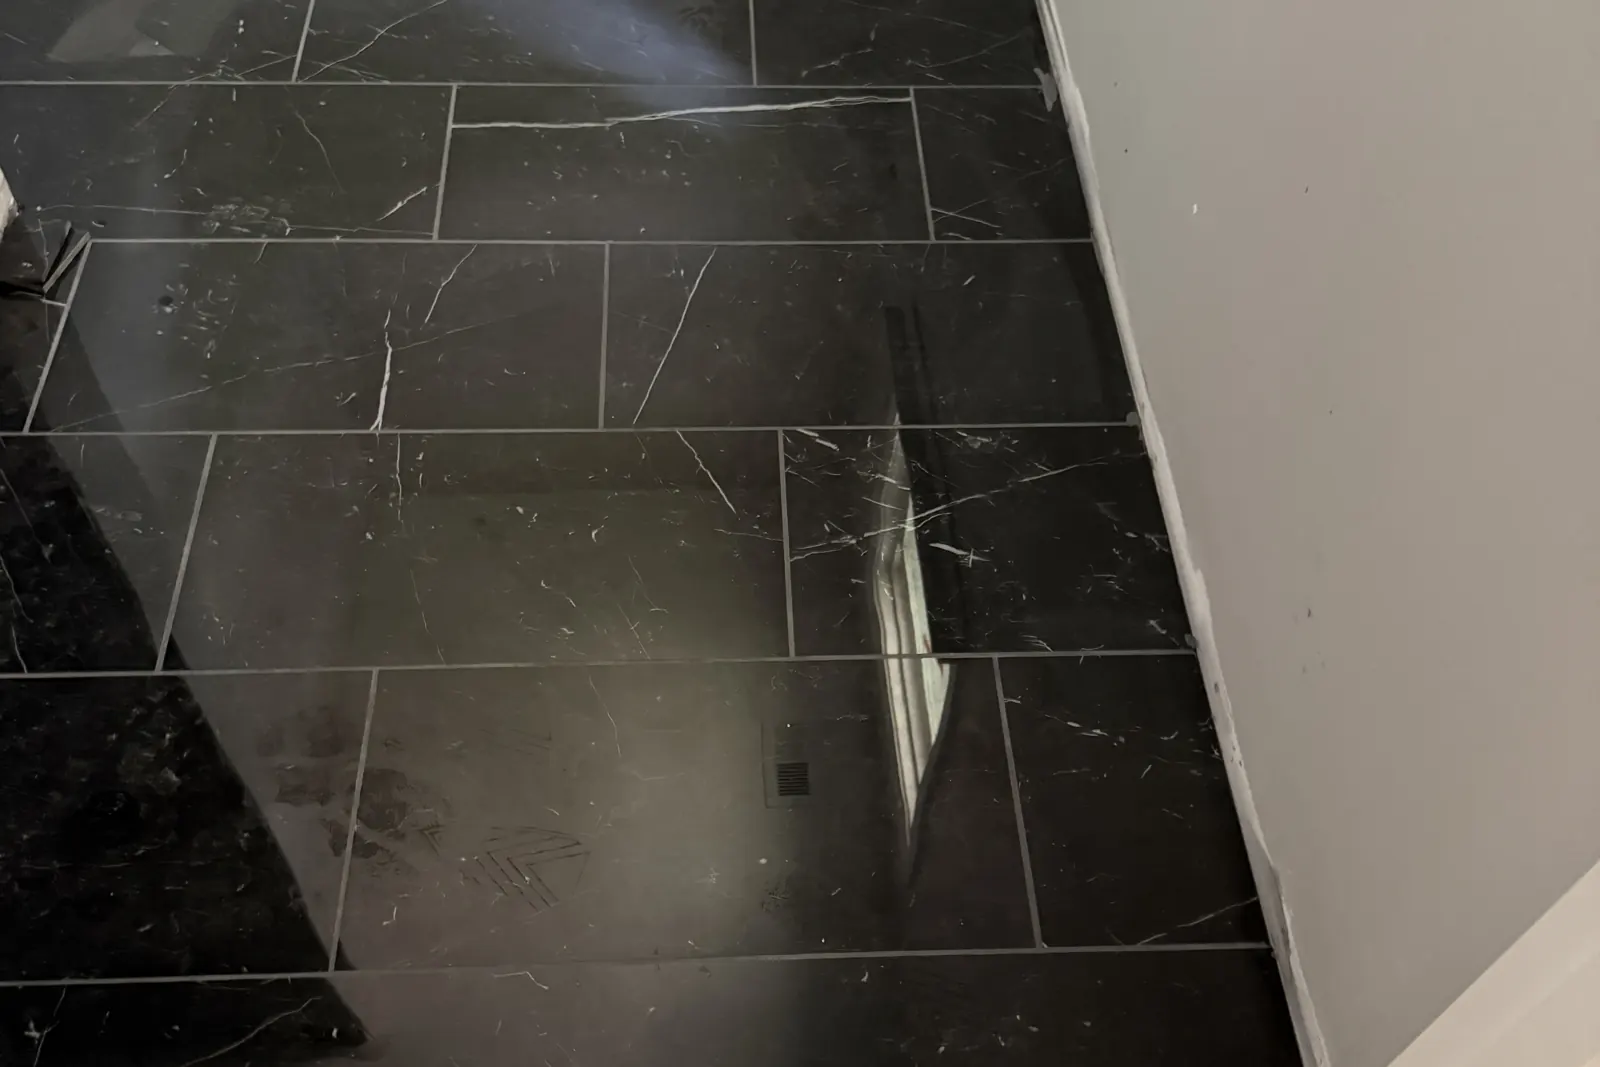
See the Floor Before the Tile Is Ordered.
If you are in New Britain, Berlin, Newington, Plainville, Farmington, Avon or a nearby Connecticut town and need tile installation, bathroom remodeling, shower waterproofing, backsplash work, or floor tile installation, contact Dmtilellc today. Free estimates available.